Set up your node
Setting up your Node
After pairing with your Node, you will be led to the Node Setup page to apply Node level settings:
1. On the Node Setup page in the Ackcio Nimbus application, tap on the Pen icon next to node name to give the node a unique naming.
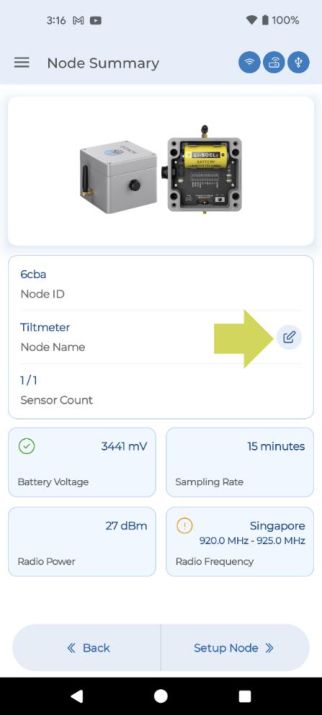
2. Once you are done with the Node settings, tap on the Setup Node button to enter the Sensor Setup page. This next page will list your configurable sensor channels, with the number depending on the type of Node being commissioned. For example, a BEAM-VW- S1 node would list 1 sensor channel while a BEAM-VW-S8 node would list 8 sensor channels.
3. For sets of instructions relating to each of our nodes and their supported sensors, please refer to Sensor wiring & setup.
CautionYou should always deploy your Nodes where they are able to communicate with the Gateway, whether it is directly or through other Nodes in the network. If you deploy your Nodes without a connection to the Gateway, they will drain their battery faster and potentially become unusable once their battery has completely drained.
Setting up a Sensing Node as a Repeater
To ensure optimal battery performance, whenever possible we would recommend using a BEAM- RN node where repeaters are necessary. However, all of our nodes can be used as repeaters, even if no sensors are connected.
When using a sensing node as a repeater, please ensure that the sensor is disabled upon commissioning. Doing so would ensure your node is not unnecessarily using the battery, trying to take a reading from a sensor that is not connected.