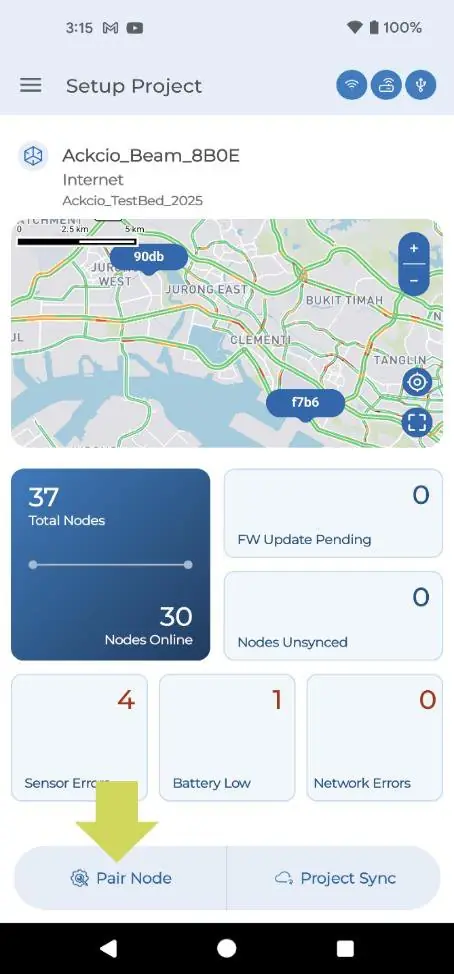
Connect your Android phone to a node (Snape 1.0)
Connecting your Android device to your Node
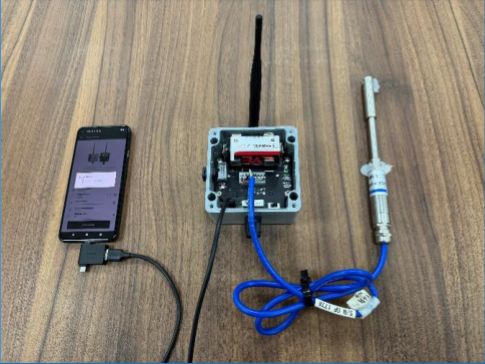
To allow your Android device to interface with your Node, you will need to use the OTG adapter and micro USB cable provided by Ackcio:
1. Open the Ackcio Nimbus application on your Android device and tap the GW ID and it will bring you to the Project List page.
2. Tap on your project to select it.
3. Connect the Node to your Android device using the USB cable. Ensure that your OTG adapter is connected to your Android device as shown on the right.
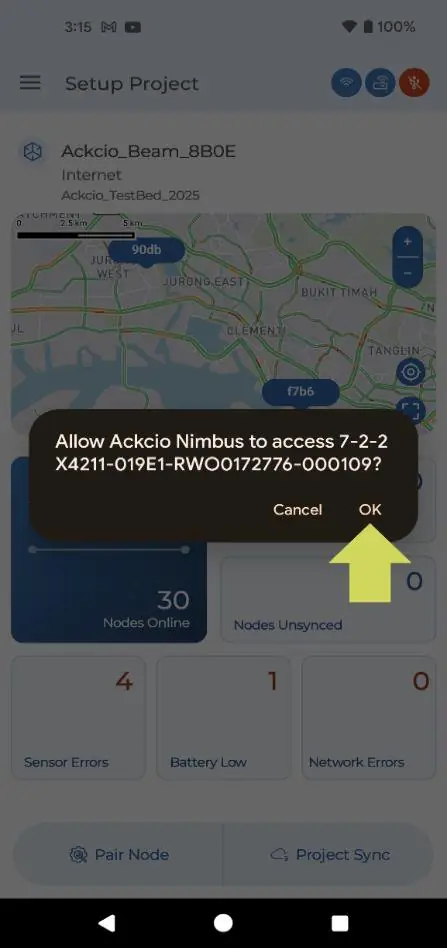
4. A popup will appear on your phone, requesting your permission for the Ackcio Nimbus application to access the node. Tap the OK button.
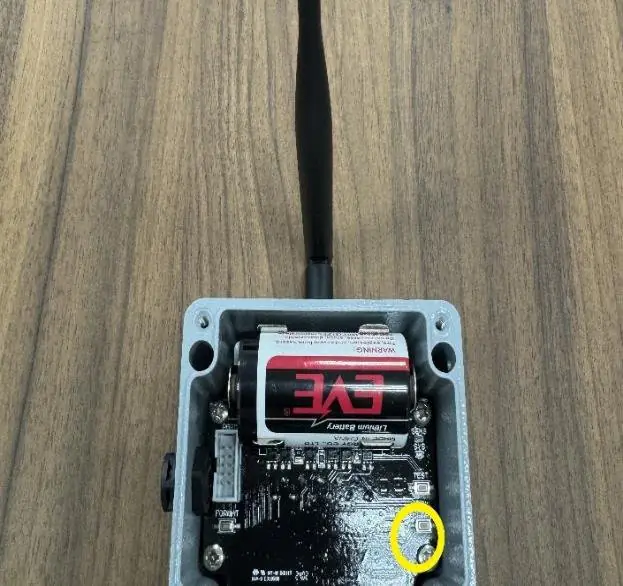
5. Press the Reset button on the Node. This will put the node into Pairing mode and show you the hybrid voltage of HPC and D Cell.
6. Within 10 seconds of the previous step, tap the Pair Node button on the Ackcio Nimbus application. Upon successful pairing with the node, you will enter the Node Setup page. At this point, the SYS LED on the node will stop blinking and turn solid.