Email alerts, part B: create an alert rule
Once SMTP is configured, alert rules can be created on any parameter of any node dashboard.
STEP 9 Open the relevant dashboard
From the left-hand menu, click Dashboards. Dashboards are organized into two groups: one for TM-L nodes and one for Mesh nodes. Open the dashboard containing the node and parameter you want to alert on.
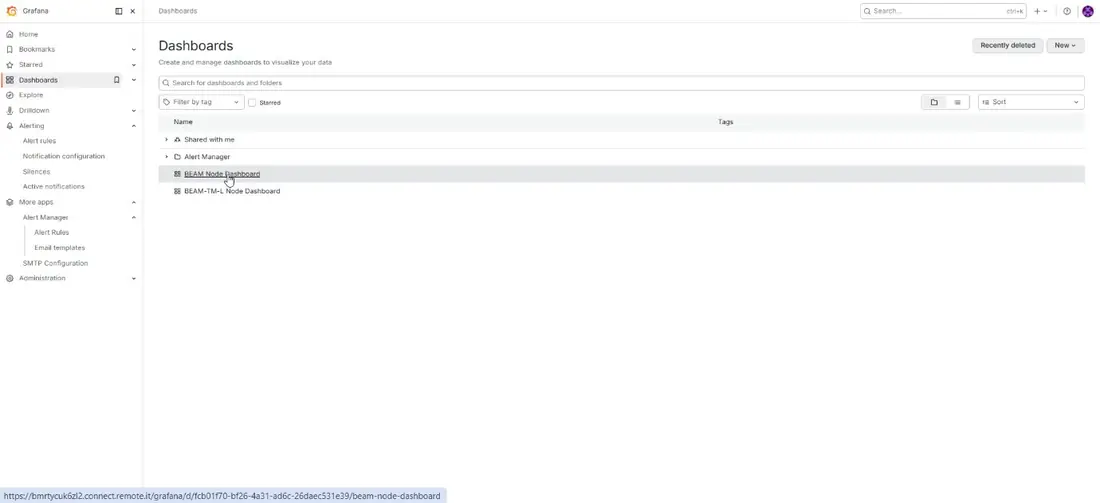
Fig 4.1: Dashboards list, split between TM-L nodes and Mesh nodes.
STEP 10 Select the parameter to alert on
Each parameter (e.g. Temperature, Battery, Pressure, or an individual sensor channel) is shown in its own panel. As an example, this manual sets an alert that fires by email whenever Temperature exceeds 25°C. Click the three-dot menu in the top-right corner of the panel.
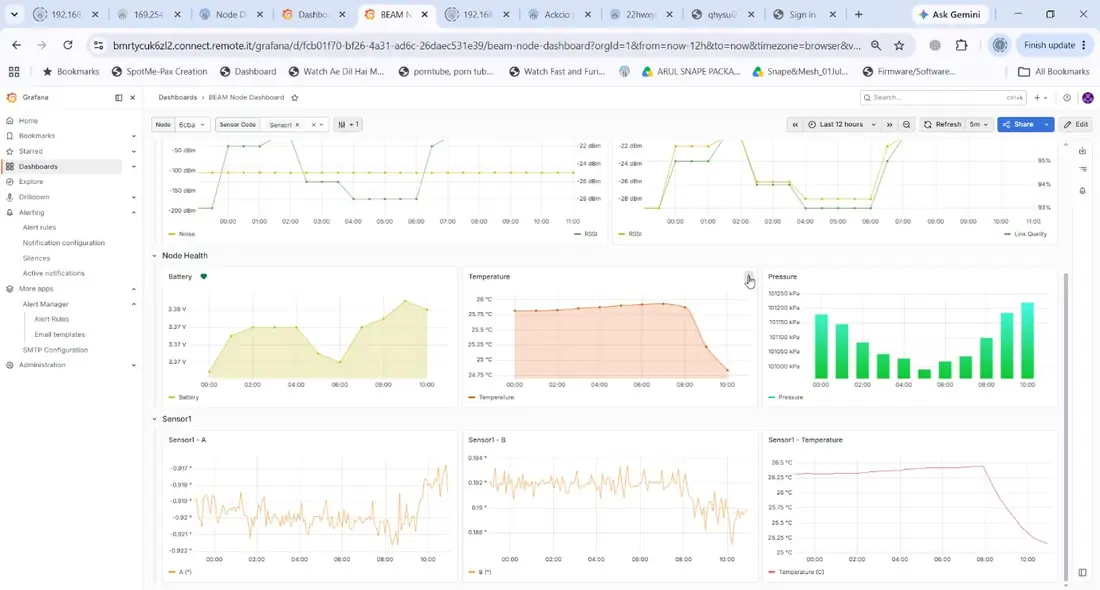
Fig 4.2: Opening the panel menu for the Temperature parameter.
STEP 11 Enable the alert
From the panel menu, go to Extensions → Enable Alert.
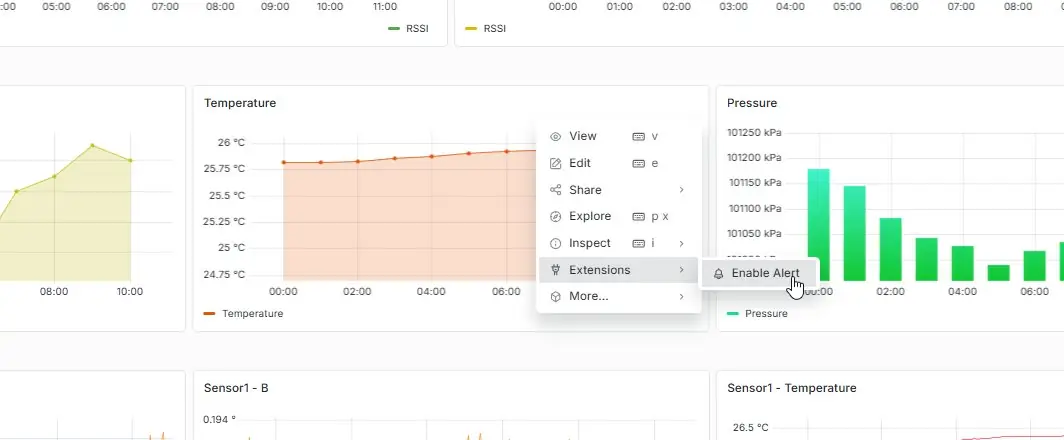
Fig 4.3: Panel menu path: Extensions → Enable Alert.
STEP 12 Set the alert condition
The Alert Manager window opens, pre-filled with the panel name as the alert name. Configure the threshold that should trigger the alert, for this example, Temperature Is above 25 (Absolute mode).
| Field | Description |
| Mode | Absolute uses the raw sensor value; Percentage triggers based on a percentage change. Choose whichever suits the parameter being monitored. |
| Threshold value & | The number and comparison (e.g. "Is above", "Is below") that |
| condition | defines when the alert fires. |
| Add threshold | Allows a second condition to be added to the same alert rule if needed. |
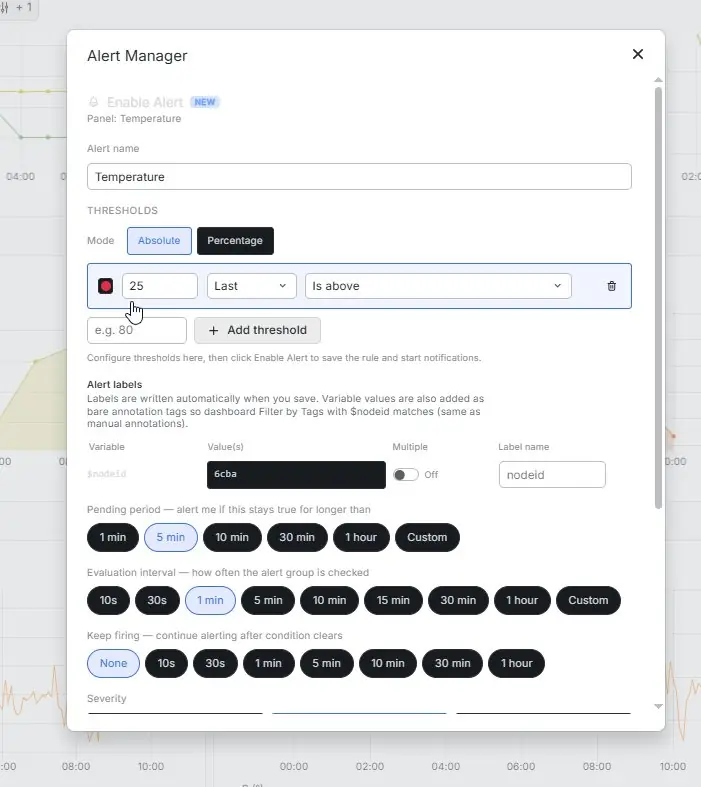
Fig 4.4: Setting the alert threshold: Temperature is above 25°C (Absolute mode).
STEP 13 Apply to multiple nodes (optional)
If the same alert condition should apply across several nodes at once, they can all be selected here rather than repeating the setup individually for each node.
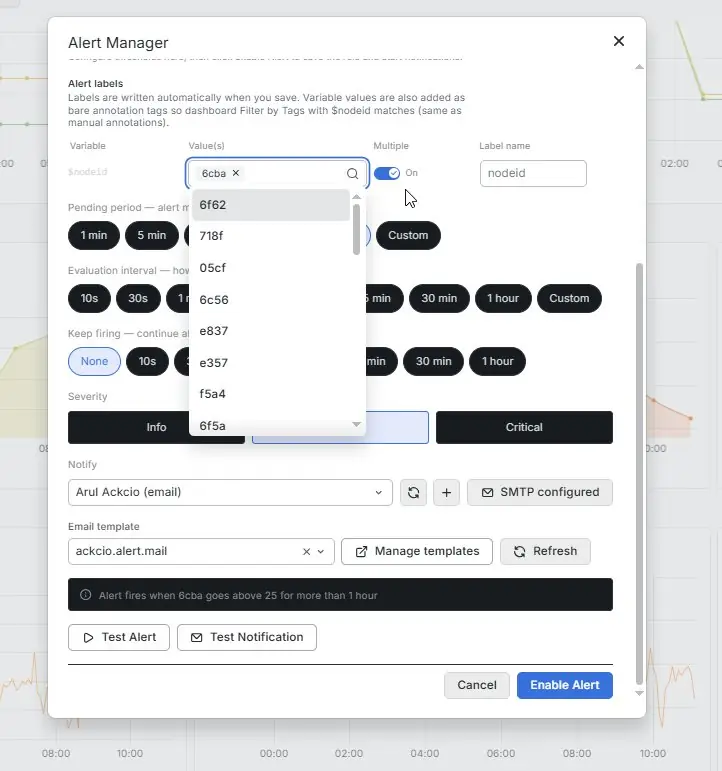
Fig 4.5: Selecting multiple nodes to apply the same alert rule.
STEP 14 Set the alert timing
Three timing parameters control how the alert behaves:
| Field | Description |
| Pending period | How long the condition must remain true before the alert actually fires (avoids false triggers from brief spikes). |
| Evaluation interval | How often the alert condition is checked. This should generally |
| match the node's sampling interval set in Snape 2.0. | |
| Keep firing | How long the alert stays active after the condition has cleared, before it is marked resolved. |
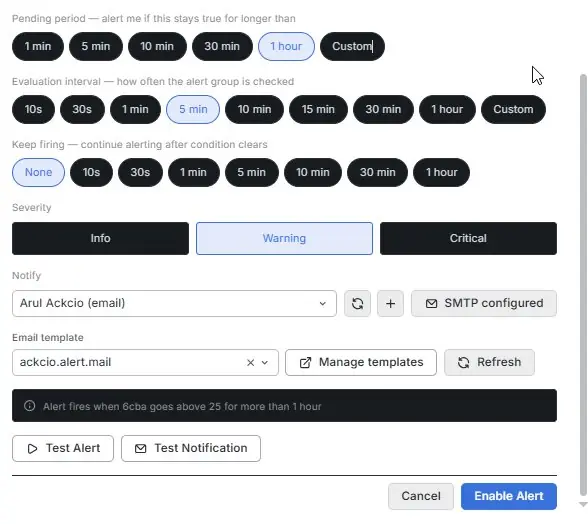
Fig 4.6: Timing parameters: pending period, evaluation interval, and keep-firing duration.
STEP 15 Assign severity and recipients
Set a Severity level (Info, Warning, or Critical), then add one or more recipients under Notify. Any number of recipient email addresses can be assigned to a single alert.
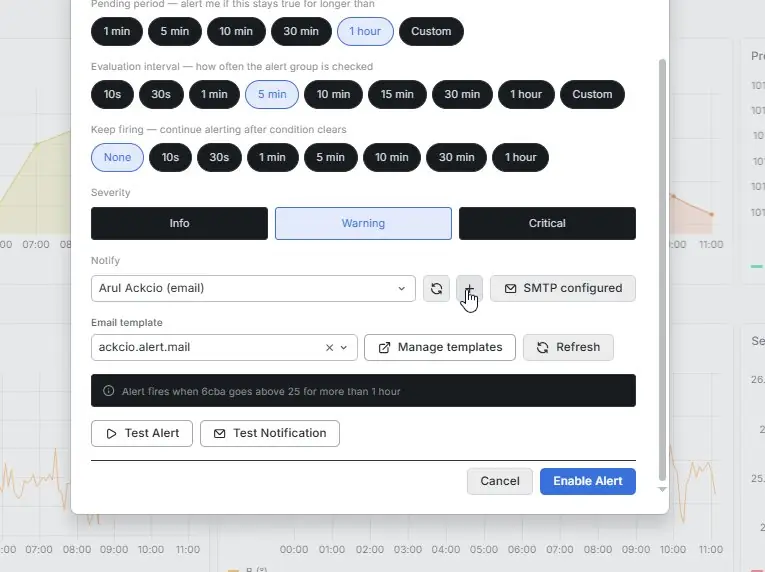
Fig 4.7: Assigning severity level and recipient email addresses.
STEP 16 Choose a notification template and enable the alert
Select a predefined email template, or create a custom one via Manage templates. Use Test Alert or Test Notification to confirm the email is delivered correctly before going live. Once satisfied, click Enable Alert.
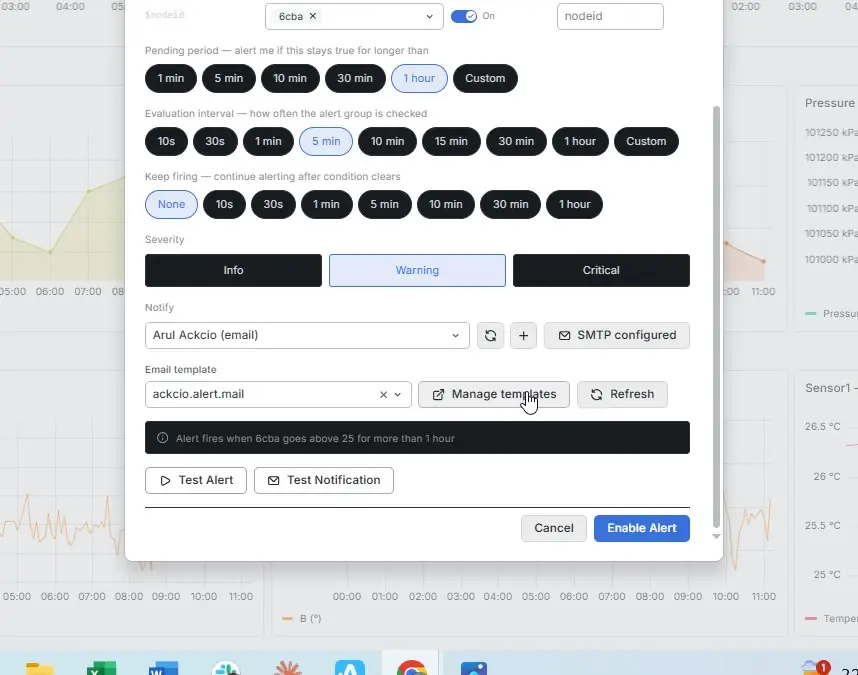
Fig 4.8: Selecting an email template and enabling the alert.
NOTE: This process is the same for every parameter panel, on every node, only the threshold, timing, and recipients change per alert.