Data upload settings (API and FTP) (Snape 1.0)
Configuring data upload settings
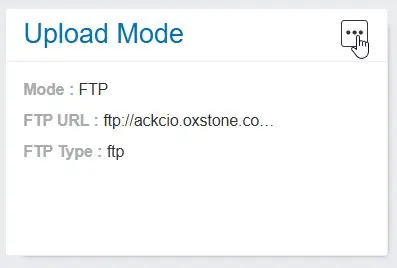
The “Upload” panel allows users to configure how and where the gateway will upload the data that is collected from all of the nodes in the project. The options available are to upload the data via API or FTP. Click on the three horizontal dots in the “Upload” panel of your gateway and select one or both of the available FTP or API modes. Gateway could upload to both FTP and API simultaneously at one go provided there is Internet in GW with power supply.
Using either FTP or API mode, users can select which data from their nodes they would like to have uploaded to their servers. The available selections are Sensor, Node, Sensor Error, Network, and Heartbeat data, with only Sensor data being mandatory. Under “Advanced Settings”, users will also see “Background Sync” as an available option, selecting this checkbox will enable data stored on the GW’s internal memory to be transmitted to the server of your choice.
API Upload
Ackcio offers several API integrations with popular industry standard platforms. To use one of these platforms for your data upload, simply retrieve your API key from your server provider, and enter it into the API Key field.
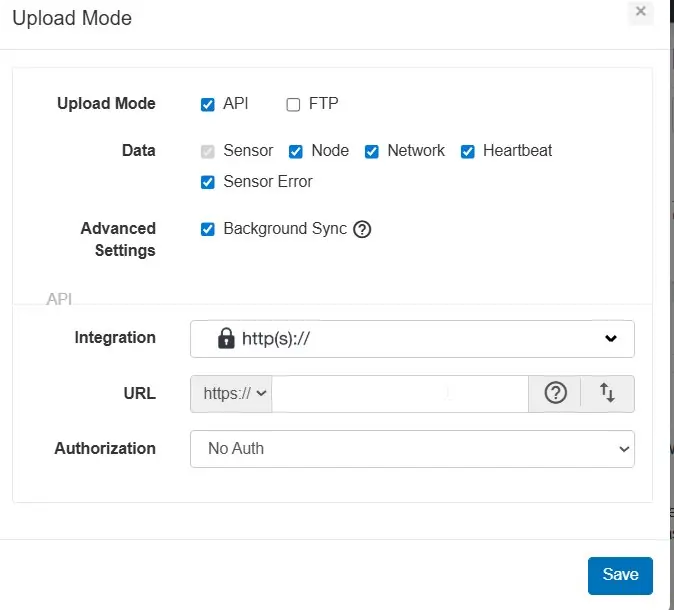
Users may also use their own API server if they do not wish to use one of our integrated solutions. To use your own API server, simply enter in the URL into the URL field and confirm your authorization settings.
Both http and https are supported, as well as authorization options to allow users to set No Authorization or to use an API key, Bearer Token or Basic Auth
FTP Upload
Data upload to an FTP server is also supported by checking the FTP box in the upload mode settings panel. Implicit, and explicit encryption are supported, as well as no encryption if encryption is not required.
- Implicit encryption uses port 990
- Explicit encryption does not require a change of port and may remain on port 21
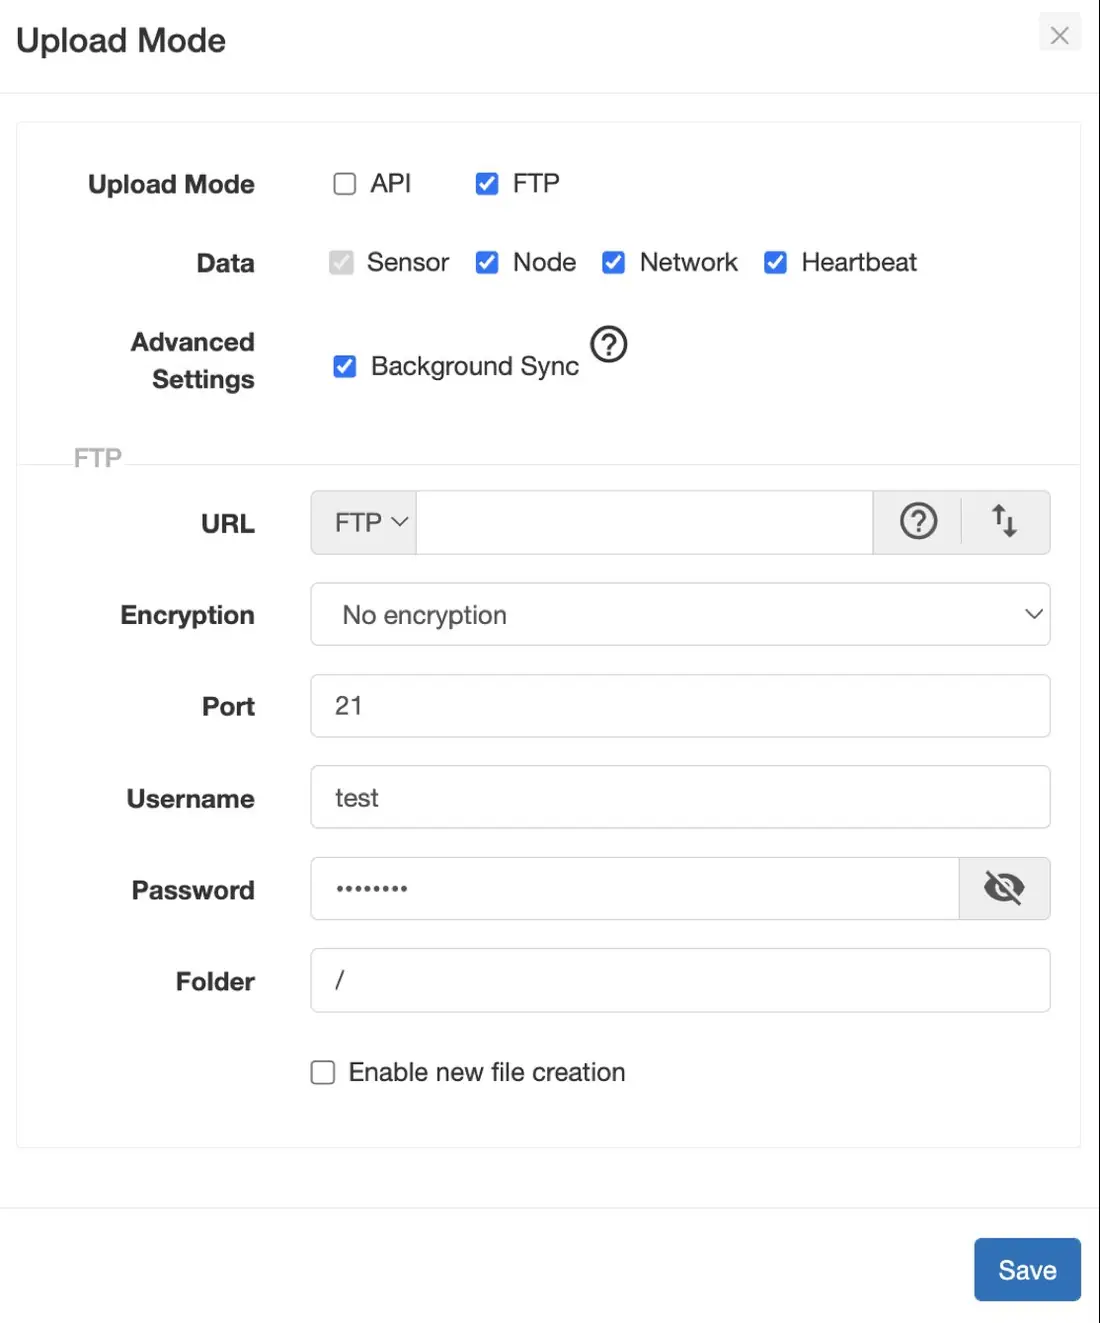
Did you know?When FTP is selected, your gateway will send Node, Network, Sensor, and Gateway metric data to your FTP server as it is received from your nodes. The first file uploaded will be created with a header and all subsequent data will be appended to this file as it is received. Users also have the option to create a new file for each data upload by clicking the “Enable new file creation” check box.
If you are experiencing issues with your FTP upload, the issue could be one of these common mishaps.
1) A mismatch between what is configured in your FTP server and what has been entered in the gateway settings. To resolve this, please confirm your FTP server credentials.
2) The folder specified in the gateway settings must exist exactly as written on your FTP server.
3) Ensure your FTP server has the APPE/SIZE/STOR commands enabled.
Verify data upload
Data upload can be confirmed by completing a test upload in either API or FTP mode. This test is done by clicking the up and down arrow icon next to your API or FTP URL.

This test will upload a set of dummy data to your API or FTP server that will not interfere with your sensor data, but contains no relevant data for your deployment. It is simply meant to determine if the gateway is able to communicate with your server.
Once the test has been completed, you will see a popup in the bottom left of your screen indicating whether the test was successful. You may then check your server to confirm that the dummy data has arrived.